In today’s digital era, creating a passport-size picture at home has become easier than ever. With the advancement of smartphones, high-resolution cameras, and editing software, you no longer need to visit a professional studio to get a high-quality passport photo. Whether you need it for official documents, visas, job applications, or other identification purposes, knowing how to create a passport-size picture at home can save you time and money.
This guide will walk you through the process, the tools required, and the advantages and disadvantages of creating passport-size pictures at home. We will also explore alternative methods for those who may need additional options.
What Is Now Create Passport Size Picture in Your Home?
Creating a passport-size picture at home refers to using a smartphone or digital camera along with editing tools to generate an image that meets the official requirements for passport and identification photos. This method allows individuals to take, edit, and print their own passport-size pictures without relying on external services.
How Now Create Passport Size Picture in Your Home
Step 1: Gather the Necessary Equipment
- A smartphone or digital camera with a high-resolution lens.
- A tripod or stable surface to avoid shaky photos.
- A plain white or light-colored background.
- Adequate lighting, preferably natural light.
- A photo editing app or software.
- A printer with high-quality photo paper.
Step 2: Taking the Picture
- Ensure the subject is facing directly toward the camera.
- Keep a neutral facial expression with eyes open and mouth closed.
- Maintain proper posture without any shadows on the face.
- Avoid any head coverings unless required for religious or medical reasons.
- Ensure the photo is well-lit and clear, without any overexposure.
Step 3: Editing the Picture
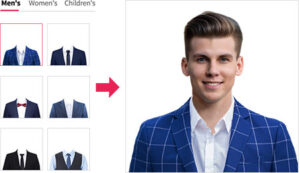
- Use an online passport photo editor or apps like Photoshop, Adobe Express, or Passport Photo Maker.
- Crop the image to the standard passport size (usually 2×2 inches or 35x45mm, depending on the country).
- Adjust brightness and contrast to ensure clarity.
- Remove any background distractions or color inconsistencies.
- Ensure the image meets the required DPI (dots per inch) standard, usually 300 DPI.
Step 4: Printing the Picture
- Use a high-quality color printer.
- Print on glossy or matte photo paper.
- Cut the printed photo to the required dimensions.
- Verify the final output by comparing it with official passport photo requirements.
Features of Now Create Passport Size Picture in Your Home [Completely Detailing]
| Feature | Description |
|---|---|
| Cost-Effective | Eliminates the need for professional photography services. |
| Convenience | Can be done anytime from the comfort of your home. |
| Control Over Quality | Adjust lighting, background, and clarity as per requirements. |
| Multiple Attempts | No additional cost for retakes if the photo is not perfect. |
| Customizable | Can be edited to fit various official document requirements. |
| Instant Printing | Get the photos immediately without waiting for studio processing. |
Pros of Now Create Passport Size Picture in Your Home
| Pros | Details |
| Saves Money | No need to pay professional photographers. |
| Time-Saving | No travel or waiting times required. |
| Retake as Needed | Can take multiple shots until you get the perfect one. |
| No Hidden Charges | No additional costs for reprints or modifications. |
| Digital Storage | Easily store and use the image for multiple applications. |
Cons of Now Create Passport Size Picture in Your Home
| Cons | Details |
| Quality Variations | May lack professional studio lighting and precision. |
| Printing Costs | Requires a good quality printer and photo paper. |
| Background Issues | Ensuring a plain, shadow-free background can be challenging. |
| Compliance Risks | May not meet strict passport photo regulations in some countries. |
| Equipment Dependency | Requires a good camera and proper editing tools. |
Now Create Passport Size Picture in Your Home Alternatives
| Alternative | Features |
| Professional Photo Studios | Offers guaranteed compliance with passport regulations. |
| Online Passport Photo Services | Websites like ePassportPhoto.com generate passport-ready images. |
| Retail Stores (e.g., Walmart, CVS) | On-the-spot passport photo services. |
| Mobile Passport Photo Apps | Apps like Passport Booth, ID PhotoPrint, and PhotoAiD provide passport photo templates. |
| Government Photo Kiosks | Available at post offices and official passport centers. |
Conclusion and Verdict Now Create Passport Size Picture in Your Home
Creating a passport-size picture at home is a convenient and cost-effective method for those who have the necessary tools. It allows for unlimited retakes, customization, and instant access to your photos. However, it requires attention to detail to meet official standards. If you need a quick and professional result, using an online service or visiting a photo studio may still be the best option.
Now Create Passport Size Picture in Your Home FAQs
1. Is it legal to use a self-taken passport photo?
Yes, as long as it meets the official guidelines of the issuing authority.
2. What are the common mistakes in DIY passport photos?
Some common errors include incorrect background color, poor lighting, and improper cropping.
3. Can I print my passport photo on regular paper?
No, passport photos must be printed on high-quality glossy or matte photo paper.
4. Do all countries have the same passport photo size?
No, different countries have varying size requirements. Always check the official guidelines before printing.
5. Are there free tools to create passport photos at home?
Yes, several websites and apps offer free tools for creating passport-size pictures, such as Passport Photo Maker and IDPhoto4You.
6. What’s the best way to ensure my photo meets the official requirements?
Using government-provided templates or official photo verification tools is the best approach.
By following these guidelines, you can efficiently create a passport-size picture at home without compromising on quality or compliance with regulations.